

This will always be one of my favourite cards for either Christmas or a winter birthday.
About 5 years ago I attended a demonstrator meeting and Lori Falls, brought her beautiful creation for the make n' take that evening. It was the first time I had met Lori and she was so kind, helpful and patient (I was a slow stamper and it often took me a while to catch on). Since then, every time I show this reflection card it is a big hit! I didn't get to know Lori very well but I met her from time to time and the last time was at my home for stamping. I reminded her about this fabulous card she had made. Lori had cancer and passed away a year or so ago and is really missed by her friends and all who knew her.
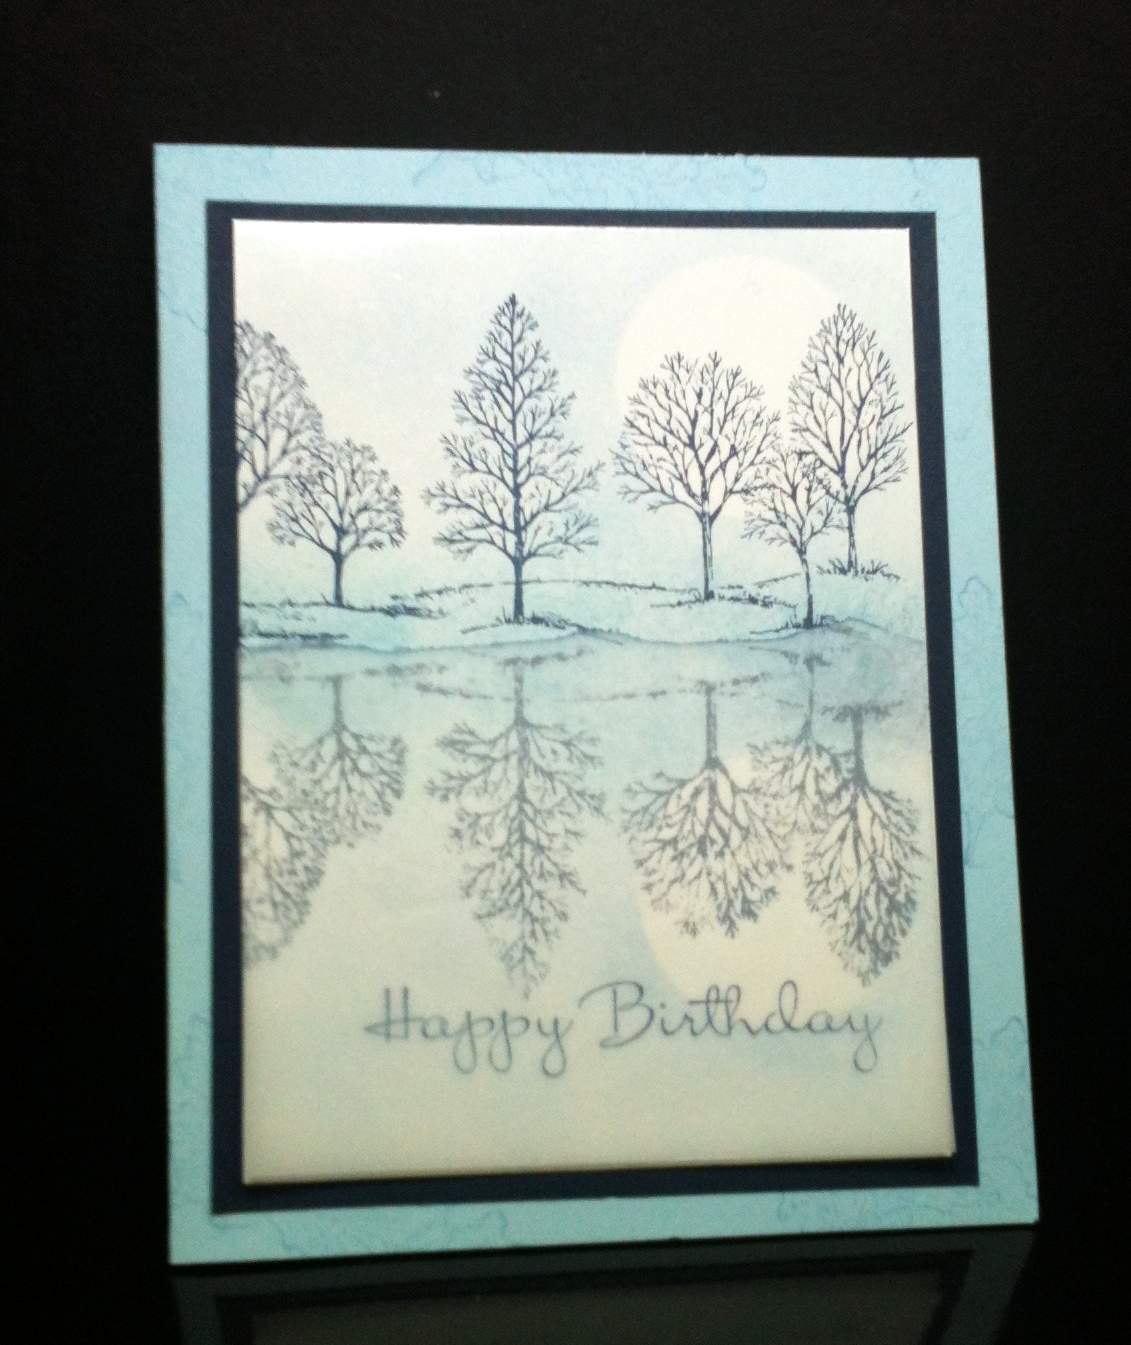
Here are the steps to make Lori's card:
Lovely as a Tree Reflection Technique
For best results, use Glossy White cardstock and stamp the trees near the top of the paper. Stamp the same image again on a clear envelope (or something equally transferable, like a sheet of acetate), flip it over, line up the image underneath the original one and press gently to transfer the image onto the glossy paper.
Use a punched round circle to create a mask on the top and bottom parts (line it up at the same place). Sponge around them with ink and then remove, leaving the moon a nice white.
Use a similar shaped piece of vellum paper to lay over the bottom half of the image (makes it even more like water) - tear the top edge and sponge it with dark ink to define the edge of the pond. Then use a bit of glue and some dazzling diamonds glitter to create a snowbank!
The sentiment is stamped on the vellum layer.
First in versamark, then in night of navy ink and gently heat emboss with a
mixture of clear embossing powder and dazzling diamonds glitter. (be careful not to heat vellum to much, it
curls!).
Details & Supplies
used:
- Stamp Set: ‘Lovely as a Tree’, Peace
on Earth from ‘Four the Holidays’ (retired)
- Bashful Blue Card Base: 8 ½ X 5 ½”,
scored at 4 ¼” and folded in half
- Night of Navy mat Layer: 3 ¾” x 5”
- Glossy Card Stock (White): 3 ½” x 4 ¾”
- Vellum: 3 ½ x 3 ½ (and then torn to
fit image)
- Punches: 1 3/8” circle punch – punch
out of a post-it note (get the sticky part so you can easily position your
masks)
- Clear Cellophane Envelope or Piece of
acetate big enough to stamp tree image on
- Night of Navy Ink (Trees, Sentiment & used sponge to edge
vellum)
- Bashful Blue Ink & Sponge (sky and reflected water)
No comments:
Post a Comment